Want to get rid of the grease and grime inside your air fryer? It’s time for a deep cleaning! If you are like me, you love using your air fryer. Who wouldn’t when you can cook delicious and nutritious meals in half the time, right!? However, like every kitchen appliance, over time dirt and odors can build up.
Luckily, I found out that it’s pretty easy to clean your air fryer.
By reading this article you’ll learn:
- How to clean your air fryer (without damaging it) from start to finish.
- Why it’s important to clean your air fryer – and when.
- Tips for cleaning your air fryer basket.
- 4 air fryer cleaning solutions to get the job done.
- What NOT to do when cleaning your air fryer.
- How To Clean An Air Fryer from Start To Finish in 7 Easy Steps
- 4 Easy Hacks For Cleaning Your Air Fryer Basket
- How Often Should You Deep Clean Your Air Fryer
- Four Air Fryer Cleaning Solutions To Get The Job Done
- How To Get Rid Of Nasty Odor In Your Air Fryer After Using It?
- How To Clean the Heating Element
- Top 3 Air Fryers That Are Super Easy To Clean
- What NOT To Do When Cleaning An Air Fryer
- How Do You Clean The Inside Of An Air Fryer?
- How Do You Get Baked On Grease Out Of An Air Fryer?
- Do I Need To Clean My Air Fryer After Every Use?
- Conclusion
How To Clean An Air Fryer from Start To Finish in 7 Easy Steps
Step 1: Your Supplies
The supplies you’ll need to get the job done are simple:
Air fryer cleaning brush, vegetable oil or dishwasher detergent, paper towels, sponge or scrubbing pad.
Step 2: Prepare Your Air Fryer
Remove all of the food scraps and any oil residue from inside your fryer. Place a few tablespoons of vegetable oil inside the air fryer and heat for 10 minutes. Use a paper towel to wipe up any bits that remain.
Step 3: Scrub
Using your cleaning brush, scrub all of the food particles and oil off the base and basket handle. You can also use a wet sponge or scouring pad in place of the brush if you want.
Step 4: Rinse
Remove the basket from the fryer and rinse it under warm water. Shake off any excess water and then place on a dry paper towel to dry.
Step 5: Soak
Place your air fryer cleaning brush, sponge, or scouring pad in hot soapy water and let soak for at least 20 minutes.
Step 6: Clean
After removing your air fryer cleaning supplies, use them to scrub away all of the bits and pieces of food stuck inside of the basket. You can also wipe down the rest of the fryer with soapy sponge or paper towels. Rinse any soap residue off with warm water.
Step 7: Finish
Once everything has been cleaned, it’s time to dry the fryer. We like to use a cloth towel or paper towels because they don’t leave any bits and pieces behind.
4 Easy Hacks For Cleaning Your Air Fryer Basket
1. Check Before Turning On
Always open an air fryer and make sure there’s nothing in it before turning on the preheat button. If there has been food left there from the last cook, as soon as the fryer starts to heat up, the food will start to cook and smoke, which could create a bad smell.
2. Get Rid Of The Factory Smell
If you are still getting that new or ‘factory’ smell from your air fryer when you cook something, add a spoon of white distilled vinegar and some lemon juice to the bottom of the basket.
Let it heat up on the preheat setting for 5-10 minutes at 400 degrees and then wipe down with a kitchen towel. Sometimes you may need to do this a couple of times for the odor to go away.
3. Deep Clean Your Air Fryer Regularly
Don’t leave it too long to deep clean your air fryer after a build-up of food particles has occurred. If you do, then it’s possible that odors will never go away and permanent damage may be done to the inside of your fryer.
Make sure that you are following the manual for your air fryer. There are usually warnings about using harsh chemicals when cleaning because some can damage the coating inside of the fryer.
Tips for a deep clean:
- Soak the basket in hot soapy water (never put the air fryer itself into the water!)
- Scrub with a toothbrush to remove any dried-on bits
- Wipe down the removable parts, including the handle and lid with soapy water
- Cleaning the outside of the base with a vinegar solution can remove any build-up.
- Don’t forget to unplug your air fryer before doing anything inside it!
Pro Tip: If you use a stainless steel scouring pad make sure to use rubber gloves because the particles can be very sharp and can cut your hands and nails.
4. Use A Damp Paper Towel
If you are in a rush and don’t have the time to deal with removing caked on bits of food, this simple method might be best for you. After your air fryer has cooled down, run some warm water over the parts of the basket that got dirty during cooking. Gently wipe the pieces clean with a paper towel.
How Often Should You Deep Clean Your Air Fryer
While you can clean your fryer as often as necessary, we recommend doing a deep cleaning once a month. This will ensure that all of the sticky bits and pieces won’t reside in the air fryer and leave it smelling fresh. It also allows you to take a look at any parts that may be potentially damaged, so you can get them replaced in time.
Four Air Fryer Cleaning Solutions To Get The Job Done
1. ACV (Apple Cider Vinegar) Cleaning Solution
This is an all-natural solution that works just as well as store-bought cleaning supplies. Just mix one part ACV with three parts water and dip your sponge into it. The downside is that the smell can be quite overpowering.
No products found.
2. Vinegar, Dish Soap, And Water Solution
This is probably the most common air fryer cleaning solution out there. Just mix equal parts of vinegar, dish soap, and water together in a spray bottle. Spray down your air fryer with this solution and wipe off any residue with a towel or sponge. Don’t worry about the smell because it will go away after you’ve completely dried everything off.
3. Vinegar, Baking Soda, Dish Soap, And Water Solution
This is the same as the vinegar, dish soap, and water solution we just discussed except for one extra ingredient: baking soda. The baking soda not only helps break up stuck-on bits and pieces but also acts as a deodorizer so you don’t have to worry about foul smells afterwards.
4. Dish Detergent And Water Solution
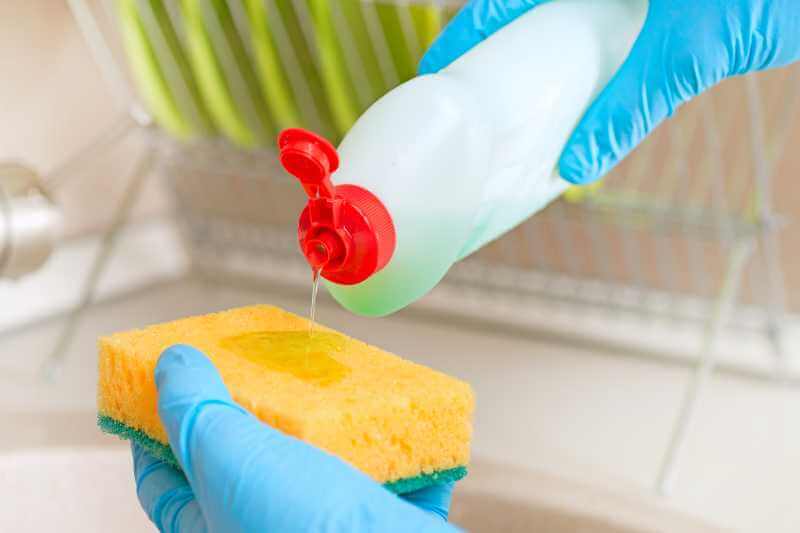
If you want a quick solution to your air fryer cleaning needs, this is the one you should go with. Just pour a bit of dish detergent into the fryer’s basket and fill it up with water. Place the basket inside and let it soak for 10 minutes before wiping everything down with a towel or sponge.
A quick note about using vinegar…
Vinegar is a great natural cleaning agent but you should never use it on your air fryer’s inner wall. It will damage the nonstick coating and leave a strong smell that’s difficult to go away.
How To Get Rid Of Nasty Odor In Your Air Fryer After Using It?
Option 1: Scrub the interior of your air fryer with a lemon slice and warm water.
Option 2: Wash your air fryer using a dishwashing liquid that neutralizes odors. Then, wipe out the inside with a clean cloth to dry it before you use it again.
Option 3: Put two tablespoons of vinegar into a small bowl, then place the bowl at the bottom of your air fryer. Set it to low heat and let it run for 15 minutes. Then, wipe out the inside with a clean cloth to dry it before you use it again.
How To Clean the Heating Element
Here’s a tip that you won’t find in any air fryer cleaning manual…
If your air fryer has the heating element on its lid, carefully remove it and wipe off any residue with a soft cloth towel. The heating element will accumulate dirt over time so if you’re having trouble getting things clean, it’s a good idea to remove it and wash it off every once in a while.
Also, if your air fryer has a nonstick coating on its lid, never use any type of scouring pads, metal brushes, abrasive cleaning agents, or other harsh chemicals to clean it.
Doing so will damage the surface and leave you with two choices: replace the lid or buy a brand new air fryer!
Top 3 Air Fryers That Are Super Easy To Clean
T-fal Compact Easy Fry 6 In 1 Digital Air Fryer
The removable drawer and pot make it super easy to clean. The drawer can be cleaned in the sink and you just need to wipe down the pot. The non-stick surface also means that no oil is required for cooking and it’s dishwasher safe.
Note: This product is currently unavailable, but we would like to recommend another great product from the same brand.
No products found.
Philips Avance Collection Airfryer
This air fryer has 2 non-stick mesh filters that make it easy to clean. The air fryer also has a nonstick drawer that you can clean by putting it in the sink or dishwasher.
No products found.
Cosori Air Fryer
The Cosori Air Fryer comes with a nonstick drawer that can be easily removed and placed right in the dishwasher. It has a removable tray so you wash it right in the sink. But be sure to remove the cord before washing as this is not waterproof. The Cosori air fryer is easy to clean down using a damp non-abrasive sponge or microfiber cloth.
No products found.
What NOT To Do When Cleaning An Air Fryer
- Avoid using any harsh chemicals or cleaning solutions that contain bleach.
- Don’t put the air fryer’s anti-stick coating in the dishwasher as this can damage it.
- Avoid using scouring pads, sponges, metal brushes, and abrasive cleansers to clean your fryer because these can damage and corrode the surface.
How Do You Clean The Inside Of An Air Fryer?
Just add a little bit of dish soap into warm water and then wipe it out with a sponge. You can also use lemon juice in the water if you prefer for a natural clean. Let the air fryer dry off before using it again. It takes less than 5 minutes to do.
How Do You Get Baked On Grease Out Of An Air Fryer?
Fill the basket with warm soapy water and let it sit for about 20 minutes. Use a scrub pad or sponge to get at any food residue that is stuck on there. For really tough grease stains, soak the basket in warm water and dish soap along with baking soda for 15 minutes. Then use a scrub pad to get it clean. Dry it off before using it again.
Do I Need To Clean My Air Fryer After Every Use?
No, it’s okay if you skip a couple of times. Cleaning after every use is the ideal thing to do but this is not always possible. Just try to clean it at least a couple of times a week for best results. If you leave it too long, you’ll start to notice some unwanted build-up and the food will taste different. Also, by not cleaning it regularly, it becomes more difficult to clean as time goes on. A clean air fryer is a happy air fryer!
Conclusion
There you have it – everything you need to know about cleaning an air fryer and keeping it running smoothly for years on end! Keeping it clean is a big part of ensuring that your fryer is in good working order (and smelling nice!), so it’s important to keep these tips and tricks in mind.
I personally always follow these tips to ensure that my fryer is always clean and ready for use. If you’re new to air frying, then this information will help prevent some of the most common mistakes that people make when cleaning their air fryers for the first time. It doesn’t matter what model you own – this process will work with any one of them.
Let us know what you think in the comments below and don’t forget to share this article if you enjoyed it.
Happy air frying!


