
Craving a rich, creamy treat? Look no further than melting Hershey’s chocolate in the microwave. Whether you want to create decadent desserts or whip up quick chocolate-dipped treats, the microwave provides a convenient and efficient method for melting chocolate. In this article, we’ll guide you through the process step by step, cover some troubleshooting tips, and explore creative ways to use melted Hershey’s chocolate.
Understanding the Basics of Melting Chocolate
Before we dive into the specifics of melting Hershey’s chocolate, let’s take a moment to understand the science behind it. Chocolate is made up of cocoa solids, cocoa butter, and sugar. When heated, the cocoa butter melts, giving chocolate its smooth, melt-in-your-mouth texture. It’s crucial to melt chocolate gently and avoid overheating, as it can cause the chocolate to separate or become grainy.
The Science Behind Melting Chocolate
When chocolate is heated, the cocoa butter crystals break down, allowing the fat to become fluid. The cocoa solids, on the other hand, remain solid. Through proper heat control and stirring, you can achieve a silky-smooth consistency.
Now, let’s delve deeper into the science behind melting chocolate. The melting point of cocoa butter is around 93°F (34°C), which is slightly below body temperature. This means that chocolate starts to melt as soon as it comes into contact with your warm fingers. However, when melting chocolate for baking or other culinary purposes, we need to heat it to a higher temperature to ensure it becomes fully liquid.
As the chocolate is heated, the cocoa butter crystals undergo a process called polymorphism. This means that the cocoa butter molecules rearrange themselves into different structures, depending on the temperature. There are six different forms of cocoa butter crystals, but only one of them, called Form V, gives chocolate its desirable smooth and glossy texture.
To achieve the perfect melted chocolate, it’s important to heat it slowly and gently. This can be done using a double boiler or a microwave at low power. By applying indirect heat, you minimize the risk of overheating and scorching the chocolate. Stirring the chocolate continuously during the melting process helps distribute the heat evenly and encourages the cocoa butter crystals to break down into the desired Form V.
Why Choose Hershey’s Chocolate for Melting?
Hershey’s chocolate is a popular choice for melting due to its high-quality ingredients and smooth texture. The brand’s commitment to producing delicious chocolate makes it perfect for creating mouthwatering desserts and treats.
When it comes to melting chocolate, the quality of the ingredients matters. Hershey’s uses premium cocoa beans and carefully selects the finest cocoa solids and cocoa butter. This attention to detail ensures that the chocolate melts smoothly and consistently, resulting in a velvety texture that enhances any recipe.
Another reason why Hershey’s chocolate is ideal for melting is its versatility. Whether you’re making chocolate ganache, dipping strawberries, or creating chocolate molds, Hershey’s chocolate is easy to work with. Its balanced flavor profile and creamy texture make it a reliable choice for both professional bakers and home cooks.
Furthermore, Hershey’s commitment to sustainability and ethical sourcing adds an extra layer of satisfaction when using their chocolate. By choosing Hershey’s, you can enjoy your delicious creations knowing that the chocolate you used was produced responsibly and with care for the environment.
Preparing Your Microwave for the Melting Process
Before you begin melting Hershey’s chocolate in the microwave, it’s important to prepare your cooking space accordingly. Here are a few crucial steps to follow:
When it comes to melting chocolate in the microwave, taking the time to properly prepare your cooking space can make all the difference in achieving smooth and velvety results. By following these steps, you’ll ensure that your chocolate melts evenly and retains its delicious flavor.
Setting the Correct Temperature
Start by selecting the appropriate temperature setting on your microwave. It’s best to use a low-power or defrost setting to avoid scorching or burning the chocolate. This gentle heating method allows the chocolate to melt slowly and evenly, preventing any undesirable changes in texture.
If your microwave doesn’t have specific temperature settings, don’t worry! You can still achieve excellent results by using short bursts of low-power heat. Simply microwave the chocolate for a few seconds at a time, stirring in between, until it reaches the desired consistency.
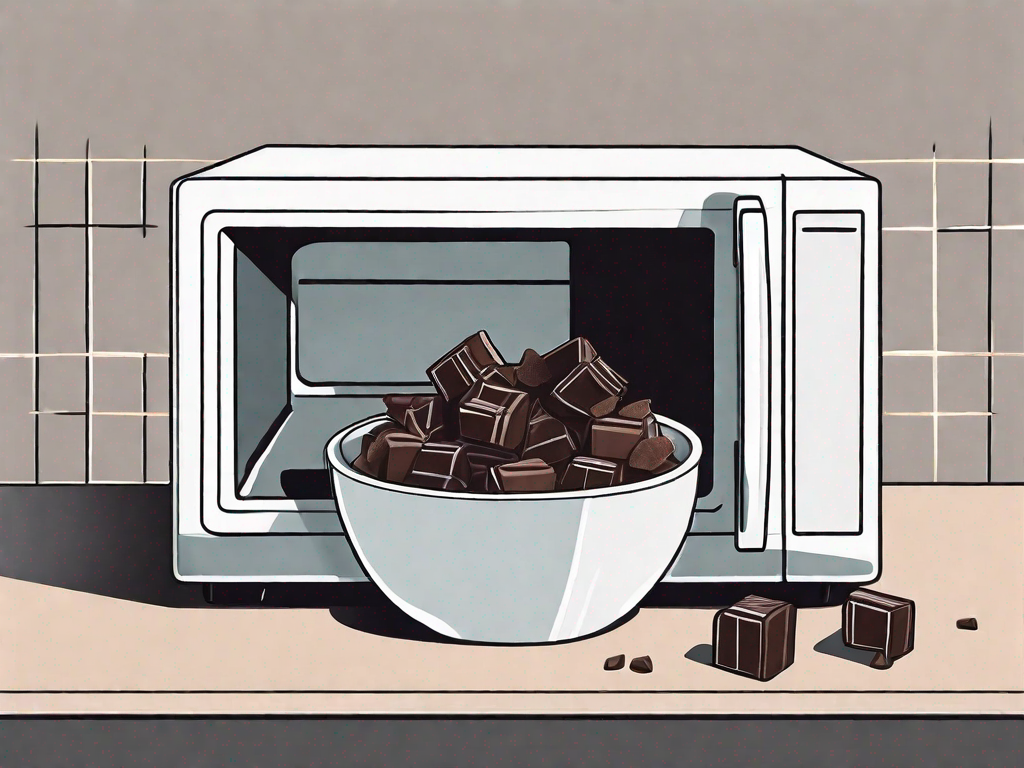
Choosing the Right Microwave-Safe Bowl
Next, ensure that you have a microwave-safe bowl that is large enough to hold the desired amount of chocolate. Opt for a glass or ceramic bowl, as these materials distribute heat more evenly compared to plastic. Plastic bowls, on the other hand, may retain excess heat and lead to uneven melting or even cause the chocolate to scorch.
It’s also important to make sure that the bowl is clean and dry before adding the chocolate. Any moisture or residue in the bowl can affect the texture and flavor of the melted chocolate. So, take a moment to give the bowl a quick wash and dry it thoroughly before proceeding.
By selecting the right temperature setting and using a microwave-safe bowl, you’re setting yourself up for success in the chocolate melting process. These simple yet crucial steps will help you achieve perfectly melted chocolate that’s ready to be used in your favorite recipes or enjoyed on its own.
Step-by-Step Guide to Melting Hershey’s Chocolate in the Microwave
Now that your microwave and bowl are prepared, it’s time to start melting your Hershey’s chocolate. Follow these steps for a foolproof process:
Breaking the Chocolate into Pieces
Begin by breaking the Hershey’s chocolate bar into smaller, uniform pieces. This helps the chocolate melt evenly and allows for easier stirring.
When breaking the chocolate, you may notice the satisfying snap as the bar separates into smaller chunks. The aroma of rich cocoa fills the air, heightening your anticipation for the delicious treat that awaits. Take a moment to appreciate the smooth, glossy surface of the chocolate, imagining the velvety texture it will acquire once melted.
Setting the Microwave Timer
Place the chocolate pieces in the microwave-safe bowl and cover it with a microwave-safe lid or microwave-safe plastic wrap. Set the timer for 30-second intervals initially, as this prevents overheating. Stir well after each interval to distribute the heat evenly.
As you place the bowl in the microwave, you can almost feel the excitement building. The anticipation of watching the chocolate transform from solid to liquid is palpable. The microwave hums softly, its gentle vibrations adding to the sense of anticipation. The aroma of chocolate begins to waft through the kitchen, filling the room with a delightful fragrance.
Stirring the Chocolate for Even Melting
Stirring is a crucial step in melting chocolate. It ensures that the heat is evenly distributed, preventing any hot spots that could cause the chocolate to burn. Gently stir the chocolate using a silicone spatula or wooden spoon until it reaches a smooth, velvety consistency.
As you stir the chocolate, you can feel its silky texture against the utensil. The gentle motion of the spatula or spoon creates mesmerizing swirls in the molten chocolate, resembling an artist’s brush strokes on a canvas. The chocolate gradually transforms from solid chunks into a luscious, glossy liquid, captivating your senses with its enticing aroma.
With each stir, the chocolate becomes more velvety, its consistency resembling a luxurious sauce. The rich, deep brown color of the melted chocolate is a feast for the eyes, evoking images of decadent desserts and indulgent treats. The anticipation of using this luscious creation in your favorite recipes intensifies, as you imagine the delightful taste it will add to your culinary creations.
Troubleshooting Common Issues in Melting Chocolate
Even with careful preparation and execution, sometimes things can go awry when melting chocolate. Here are some common issues you may encounter and how to troubleshoot them:
Preventing the Chocolate from Burning
If you notice the chocolate starting to burn or become too hot, stop the microwave immediately. Stir vigorously to dissipate the heat and return the chocolate to a smooth texture. To prevent this issue in the future, reduce the microwave power and decrease the melting time.
When melting chocolate, it is important to exercise caution and be mindful of the temperature. Chocolate has a low melting point, and if it gets too hot, it can burn easily. The burning process can be quick, and once the chocolate is burnt, it becomes unusable.
One way to prevent the chocolate from burning is to use a microwave-safe bowl and melt the chocolate in short intervals, stirring in between. This allows for even heating and reduces the risk of overheating. Additionally, reducing the microwave power and decreasing the melting time can help maintain a lower temperature and prevent burning.
Another technique to prevent burning is to use a double boiler. This involves placing a heatproof bowl with the chocolate over a pot of simmering water. The steam from the water gently melts the chocolate, providing a more controlled and gradual heating process.
Dealing with Seized or Grainy Chocolate
If your chocolate becomes clumpy or grainy, it has likely seized. This can happen if a small amount of liquid, such as water or steam, comes into contact with the chocolate. To salvage seized chocolate, try adding a tablespoon of warm milk or cream and gently stirring until it becomes smooth again.
Seized chocolate can be frustrating, but there are ways to rescue it. When chocolate seizes, it means that the cocoa butter in the chocolate has separated from the cocoa solids, resulting in a thick, clumpy texture.
To prevent chocolate from seizing, it is important to keep it away from any moisture. Even a small amount of water or steam can cause the chocolate to seize. Make sure all utensils and equipment used for melting the chocolate are completely dry, and avoid using wet hands or introducing any liquid near the chocolate.
If your chocolate does seize, there are a few methods you can try to save it. One method is to add a tablespoon of warm milk or cream to the seized chocolate and gently stir until it becomes smooth again. The added liquid helps to rehydrate the chocolate and bring it back to a workable consistency.
Another technique is to gradually add small amounts of vegetable oil or melted cocoa butter to the seized chocolate while stirring. This helps to reintroduce fat into the chocolate and can help smooth out the texture.
It’s important to note that while these methods can often salvage seized chocolate, the texture and quality may not be the same as before. It’s always best to prevent seizing in the first place by being cautious and keeping the chocolate dry.
Creative Uses for Melted Hershey’s Chocolate
Now that you know how to melt Hershey’s chocolate in the microwave, let’s explore some fun and delicious ways to use it:
Making Chocolate-Dipped Treats
Dip strawberries, pretzels, or cookies into melted Hershey’s chocolate for a delightful sweet and salty combination. You can also experiment with other fruits or snacks to create your own unique treats.
Creating Chocolate Drizzles and Designs
Drizzle melted Hershey’s chocolate over cakes, cupcakes, or ice cream for an elegant touch. Use a spoon, fork, or piping bag to create beautiful patterns and designs that will impress your guests.
Incorporating Melted Chocolate into Recipes
Expand your culinary repertoire by incorporating melted Hershey’s chocolate into various recipes. It can be a delicious addition to brownies, cookies, fudge, or even as a topping for pancakes or waffles.
With these tips and techniques, you can confidently melt Hershey’s chocolate in the microwave, avoid common pitfalls, and explore the endless possibilities of creating delectable chocolate treats. Enjoy the delightful process and indulge in the rich flavor that Hershey’s chocolate brings to your creations. Happy melting!
