
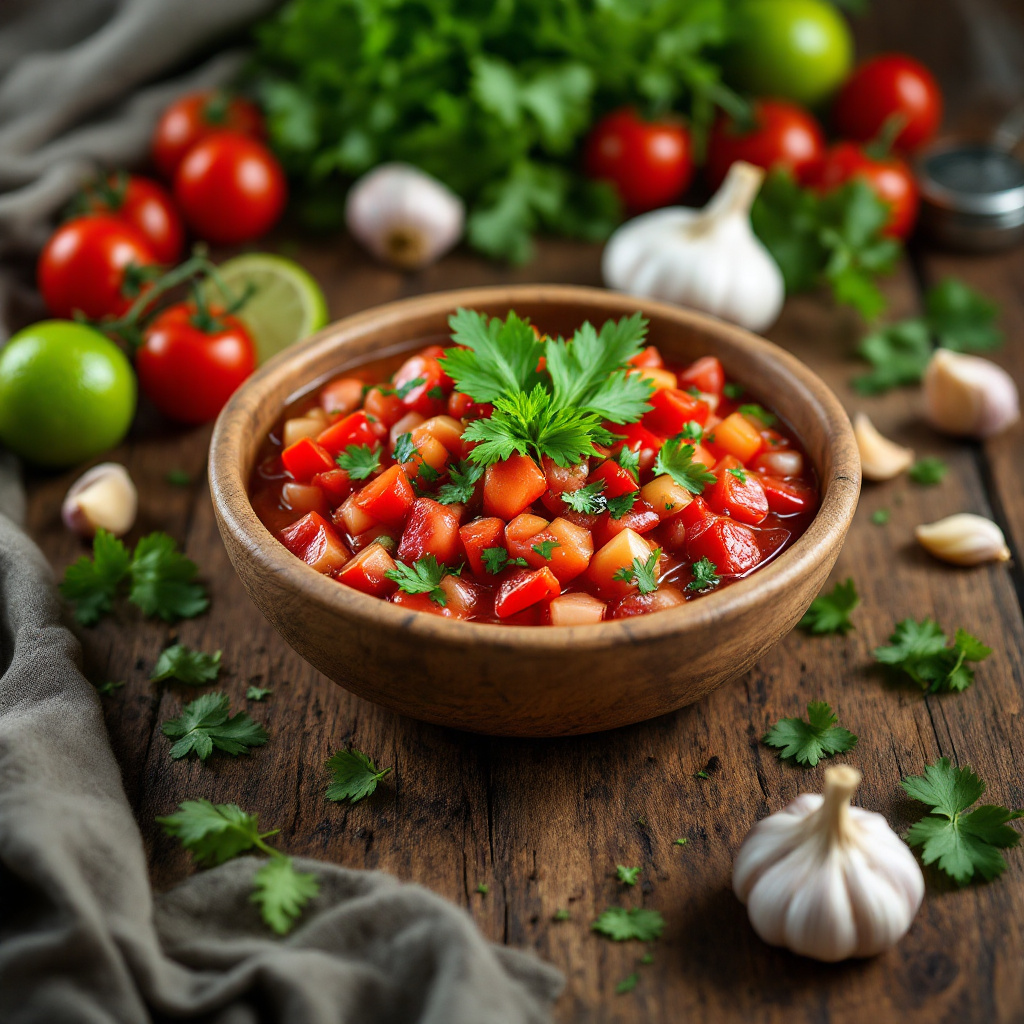
There’s something magical about homemade salsa that store-bought versions can never quite capture. The vibrant flavors of fresh tomatoes, the aromatic punch of cilantro, and the satisfying heat of jalapeños all come together in perfect harmony. But when you add roasted garlic to the mix? That’s when a good salsa becomes unforgettable. This roasted garlic salsa recipe transforms simple ingredients into a restaurant-quality dip that will have your friends and family begging for your secret.
Why Roasted Garlic Makes All the Difference
Raw garlic brings a sharp, pungent bite to dishes that can sometimes overwhelm the other flavors. Roasting garlic, on the other hand, completely transforms its character. The heat caramelizes the natural sugars in the garlic, creating a mellow, slightly sweet flavor profile with nutty undertones. The harsh bite disappears, replaced by a rich depth that infuses the entire salsa with a warm, complex character.
This roasted garlic salsa strikes the perfect balance between fresh and roasted elements. While the garlic gets the roasting treatment, the brightness of fresh tomatoes and cilantro keeps the dip lively and vibrant. It’s this contrast that makes the recipe so special and versatile enough to complement everything from tortilla chips to grilled meats.
Health Benefits of Garlic
Beyond its incredible flavor, garlic brings impressive health benefits to your salsa. Garlic contains compounds like allicin that have been shown to boost immune function and reduce inflammation. Some studies even suggest it may help lower blood pressure and cholesterol levels. While roasting garlic does diminish some of these benefits compared to raw garlic, many of the beneficial compounds remain intact, making this salsa not just delicious but nutritious too.
Ingredients You’ll Need
The beauty of this roasted garlic salsa lies in its simplicity. You’ll need fresh, quality ingredients, but nothing exotic or difficult to find. Most of these items are probably already in your kitchen or easily available at your local grocery store.
The Fresh Produce
For the base of your salsa, gather 6 medium-sized ripe tomatoes (Roma or vine-ripened work best), 1 medium white onion, 2-3 jalapeño peppers (adjust according to your heat preference), and a generous handful of fresh cilantro (about 1/2 cup packed). The freshness of these ingredients will significantly impact the final flavor, so try to source the ripest, most fragrant produce you can find.
If tomatoes aren’t in season, you can substitute 2 cans (14.5 oz each) of fire-roasted diced tomatoes. While fresh is always preferable, this alternative still yields delicious results and makes this recipe accessible year-round.
The Aromatics and Seasonings
The star of this recipe is, of course, garlic—you’ll need 1 whole head (about 10-12 cloves). Additionally, gather 2 limes for their juice, 2 teaspoons of kosher salt (or to taste), 1 teaspoon of ground cumin, and 1/4 teaspoon of freshly ground black pepper. For those who enjoy extra heat, a pinch of cayenne pepper is optional but adds a wonderful warming sensation that builds pleasantly with each bite.
Equipment Essentials
You don’t need fancy equipment to make outstanding salsa. The basics include a baking sheet for roasting the garlic, aluminum foil, a sharp knife and cutting board, and a food processor or blender. If you prefer a more rustic, chunky texture, you can simply chop everything by hand, though this will take more time and effort.
The Roasting Process
Roasting garlic might sound intimidating if you’ve never done it before, but it’s actually one of the easiest cooking techniques to master. The process transforms the garlic’s flavor while making your kitchen smell absolutely heavenly.
How to Perfectly Roast Garlic
Preheat your oven to 400°F (200°C). Take your head of garlic and cut off about 1/4 inch from the top to expose the cloves inside. Place the garlic on a piece of aluminum foil, drizzle with about 1 tablespoon of olive oil, and sprinkle with a pinch of salt. Wrap the foil around the garlic to create a sealed packet, then place it on a baking sheet and roast for 35-40 minutes until the cloves are soft and golden brown.
You’ll know the garlic is done when it’s soft enough that you can easily pierce it with a fork, and the cloves have taken on a caramel color. Let it cool for about 10 minutes before handling. Once cooled, you can squeeze the bottom of the head, and the roasted cloves will pop right out—like squeezing toothpaste from a tube!
Preparing Your Salsa
With your garlic roasted to perfection, it’s time to bring all the elements together to create your salsa. The process is straightforward, but a few key techniques will elevate your results from good to exceptional.
Combining the Ingredients
Core and quarter your tomatoes, removing the seeds if you prefer a less watery salsa. Roughly chop the onion and remove the stems, seeds, and membranes from the jalapeños (unless you want extra heat). Place these ingredients in your food processor along with the roasted garlic cloves, cilantro leaves, lime juice, salt, cumin, and black pepper.
Pulse the mixture several times until you reach your desired consistency. Some prefer a smooth, restaurant-style salsa, while others enjoy a chunkier texture with more distinct pieces of vegetable. The beauty of making it yourself is that you control the final result. Just be careful not to over-process, as this can make the salsa watery and lose the distinct textures that make it interesting.
Adjusting the Flavor
After blending, taste your salsa and adjust the seasonings. Does it need more salt? Another squeeze of lime? Perhaps a bit more heat? This is the time to fine-tune the flavor profile to your preference. Remember that the flavors will meld and develop over time, so what might seem slightly under-seasoned now could be perfect after sitting for an hour or two.
If you find your salsa too watery, you can strain some of the excess liquid through a fine-mesh sieve. Conversely, if it’s too thick, a tablespoon or two of water can thin it to your desired consistency.
Serving and Storage Suggestions
Now that you’ve created your masterpiece, it’s time to think about how to serve and store it to maximize enjoyment. This versatile salsa works in numerous contexts beyond the obvious chip-dipping scenario.
Perfect Pairings
While tortilla chips are the classic companion to salsa, this roasted garlic version is versatile enough to complement many dishes. Try it spooned over grilled chicken or fish for a burst of flavor, dolloped onto scrambled eggs for a Mexican-inspired breakfast, or used as a zesty topping for baked potatoes. It also makes an excellent addition to tacos, burritos, and quesadillas, adding moisture and flavor without the heaviness of cheese or sour cream.
For an impressive appetizer spread, serve your roasted garlic salsa alongside guacamole and queso dip with an assortment of chips and vegetable crudités. The contrasting flavors and textures create a memorable snacking experience that’s perfect for gatherings.
Storing Your Salsa
One of the advantages of homemade salsa is that it actually improves with time as the flavors meld together. Transfer your finished salsa to an airtight container and refrigerate it for at least an hour before serving, if possible. It will keep well in the refrigerator for up to one week, though the fresh cilantro may darken slightly after a few days.
If you’ve made a large batch, you can freeze portions in freezer-safe containers for up to three months. While the texture might change slightly upon thawing, the flavor remains excellent, especially when used in cooked applications like enchilada sauce or soup base.
Variations to Try
Once you’ve mastered the basic roasted garlic salsa recipe, don’t be afraid to experiment with variations that suit your taste preferences or make use of seasonal ingredients.
Fruit-Forward Twists
Adding fruit to salsa creates a delightful sweet-savory contrast that pairs beautifully with the mellow roasted garlic. Try adding a diced mango or peach during the summer months, or even pineapple for a tropical twist. The natural sweetness of the fruit balances the heat from the jalapeños and adds another dimension to the flavor profile.
Smoky Adaptations
To add a smoky element to your salsa, try roasting the tomatoes and jalapeños alongside the garlic. Place them on the same baking sheet and roast until the skins begin to char and blister. This technique imparts a deep, complex flavor reminiscent of traditional Mexican salsas made over an open flame. For even more smokiness, add a teaspoon of chipotle powder or a chopped chipotle pepper in adobo sauce.
Final Thoughts
Making your own roasted garlic salsa is more than just a culinary exercise—it’s a way to connect with the simple pleasure of creating something delicious from scratch. There’s a satisfaction in knowing exactly what goes into your food and being able to customize it to your exact preferences.
This recipe strikes the perfect balance between accessibility and impact. It’s easy enough for beginners but yields results that will impress even the most discerning palates. The roasted garlic adds a depth and complexity that elevates this salsa above ordinary versions, making it worthy of any special occasion while remaining simple enough for everyday enjoyment.
So gather your ingredients, fire up your oven, and prepare to experience salsa as it should be—fresh, flavorful, and made with love in your own kitchen. Your tortilla chips will never settle for store-bought again!
