
Freezing okra is a great way to preserve this versatile vegetable for later use. Whether you’ve grown your own okra or have a surplus from purchasing it at the store, freezing is a simple and convenient method to extend its shelf life. In this article, we will explore the basics of okra, the preparation process for freezing, storing frozen okra, and how to use it in your cooking.
Understanding the Basics of Okra
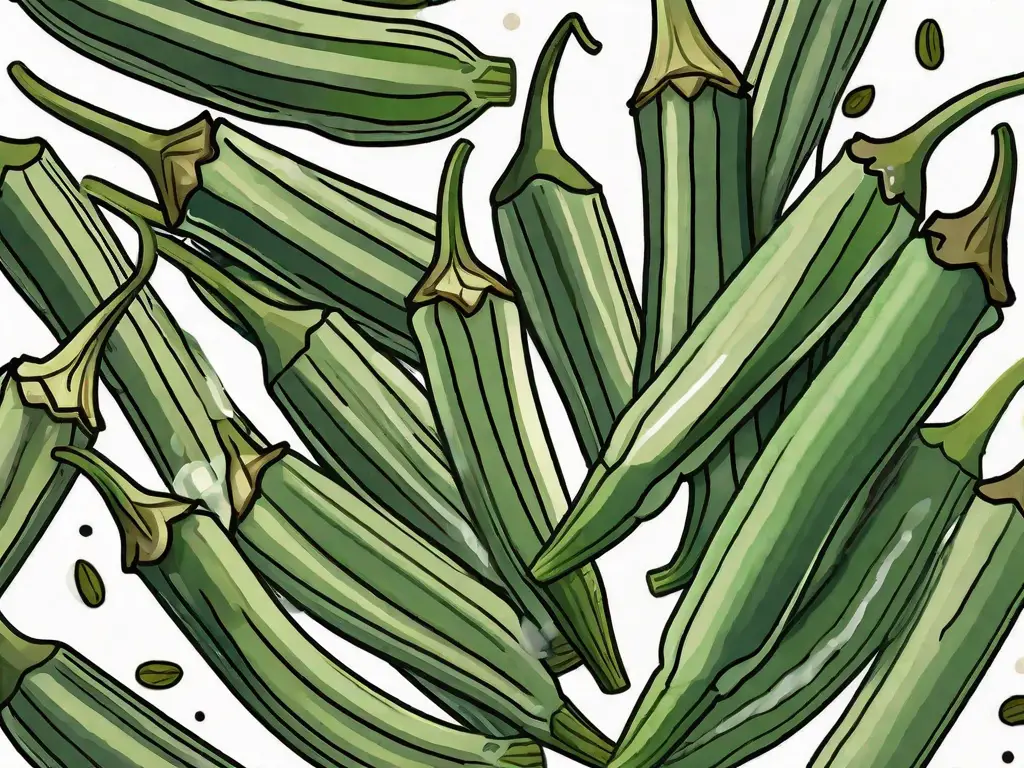
Okra is a green, pod-like vegetable that is popular in many cuisines around the world. It is known for its distinctive shape and slimy texture when cooked. Okra is low in calories and is a good source of fiber, vitamin C, and folate. It also contains antioxidants that can help protect against certain diseases.
What is Okra?
Okra belongs to the mallow family and is botanically classified as Abelmoschus esculentus. The pods are typically harvested when they are young and tender, as they become tough and fibrous as they mature.
Okra is believed to have originated in Africa and was brought to the Americas by African slaves during the transatlantic slave trade. It quickly became a staple in Southern cuisine, where it is commonly used in dishes such as gumbo and fried okra.
The plant itself is a tall, flowering annual that can reach heights of up to six feet. It produces large, yellow flowers that eventually develop into the characteristic green pods. These pods are usually harvested when they are around two to three inches long, as they are at their peak tenderness and flavor.
Health Benefits of Okra
Okra is a nutrient-rich vegetable that offers several health benefits. It is known to support digestive health, aid in weight management, and promote heart health. Additionally, the fiber content in okra can help regulate blood sugar levels and promote healthy cholesterol levels.
The slimy texture of okra, which can be off-putting to some, actually has its own benefits. The mucilage, or slime, present in okra is a soluble fiber that helps soothe and lubricate the digestive tract. This can be particularly beneficial for individuals with digestive issues such as constipation.
Furthermore, okra is a good source of antioxidants, including vitamin C and other compounds such as flavonoids and phenolic compounds. These antioxidants help protect the body against oxidative stress and inflammation, which are linked to various chronic diseases such as heart disease, diabetes, and certain types of cancer.
Okra is also rich in folate, a B-vitamin that plays a crucial role in DNA synthesis and cell division. Adequate folate intake is especially important for pregnant women, as it helps prevent neural tube defects in developing fetuses.
In addition to its nutritional benefits, okra is a versatile vegetable that can be prepared in various ways. It can be sautéed, roasted, grilled, or added to soups and stews. Its unique texture and mild flavor make it a great addition to a wide range of dishes.
Preparing Okra for Freezing
Before freezing okra, it is essential to prepare it properly to ensure the best results. This involves choosing the right okra, cleaning it thoroughly, and using the correct cutting techniques.
Freezing okra is a fantastic way to preserve its freshness and flavor for future use. Whether you grow your own okra or buy it from the local market, taking the time to prepare it correctly will guarantee a delicious outcome when you decide to use it.
Choosing the Right Okra
When selecting okra for freezing, opt for small to medium-sized pods that are firm and free from any blemishes or signs of decay. These pods are at their peak freshness and will retain their texture and taste after freezing. Avoid overripe or overly large pods, as they may have a tough texture after freezing.
It’s worth mentioning that if you have the opportunity to pick your own okra, try to harvest it when it is young and tender. Young okra pods are more suitable for freezing as they have a delicate texture and a mild flavor.
Cleaning and Cutting Techniques
Start by rinsing the pods under cool water to remove any dirt or debris. Gently rub each pod with your fingers to ensure thorough cleaning. This step is crucial as it eliminates any unwanted particles that may affect the quality of the frozen okra.
After cleaning, pat the pods dry with a clean towel or paper towel. Removing excess moisture will prevent ice crystals from forming during the freezing process, which can lead to a loss of texture and flavor.
Next, trim off the stems using a sharp knife, being careful not to cut too deeply into the pods. The stems can be tough and fibrous, so removing them will improve the overall eating experience. Optionally, you can also remove the tips of the pods if desired. This step is a matter of personal preference, as some people prefer the look of trimmed okra.
It’s worth noting that if you plan to use the frozen okra in dishes where the whole pods are required, you can skip the cutting step altogether. Simply clean the okra and freeze them as they are.
Now that you have chosen the right okra and prepared it meticulously, you are ready to freeze it. Freezing okra will allow you to enjoy this versatile vegetable all year round, whether you use it in stews, stir-fries, or as a side dish. Take the time to prepare your okra correctly, and you will be rewarded with delicious and nutritious meals in the future.
The Freezing Process
Now that your okra is properly prepared, it’s time to freeze it. The freezing process involves blanching the okra to stop enzyme activity, quick cooling, and packing it in suitable containers.
Blanching: Why it’s Necessary
Blanching is a crucial step in the freezing process that helps preserve the color, texture, and nutrient content of okra. It involves boiling the okra briefly, then rapidly cooling it to halt enzyme activity. This helps retain its quality during freezing and subsequent thawing.
When blanching okra, it’s important to consider the size of the pods. Small pods should be blanched for about 2 minutes, while larger ones may require 3 to 4 minutes. Blanching time can vary depending on the maturity and thickness of the okra, so it’s essential to monitor it closely.
Blanching not only stops enzyme activity but also helps remove any dirt or bacteria that may be present on the okra pods. This step ensures that the frozen okra remains safe to consume and free from any potential contaminants.
Quick Cooling and Packing
After blanching, immerse the okra in an ice water bath to cool it quickly and prevent further cooking. The ice water bath not only halts the cooking process but also helps to maintain the vibrant green color of the okra.
It’s important to note that overcooking the okra during blanching can result in a mushy texture. Therefore, the rapid cooling process is crucial in preserving the crispness and texture of the pods.
Once cooled, remove the okra from the water and gently pat it dry. Excess moisture can lead to ice crystals forming during freezing, which can affect the quality of the okra. Drying the pods ensures that they freeze individually and maintain their integrity.
When it comes to packing the okra for freezing, it’s recommended to use freezer-safe containers or bags. These containers are designed to withstand the low temperatures of the freezer without cracking or breaking. Additionally, they provide a barrier against moisture and air, preventing freezer burn and maintaining the quality of the okra.
Aim for single-layer packing to prevent the okra from freezing together in clumps. This allows for easy portioning and prevents the need to thaw the entire batch when you only need a small amount.
Label the containers with the date of freezing to keep track of the okra’s freshness. Properly stored, frozen okra can maintain its quality for up to 12 months.
Storing Frozen Okra
Proper storage is essential to maintain the quality of frozen okra. Consider the best containers for freezing and be sure to label them correctly for easy identification.
When it comes to freezing okra, there are a few key factors to keep in mind. One of the most important considerations is the choice of containers. Opting for airtight and moisture-resistant containers is crucial to prevent freezer burn and the absorption of unwanted odors. Freezer-safe bags or containers work well for storing frozen okra, as they provide a reliable barrier against moisture and air. By using these containers, you can ensure that your okra stays fresh and delicious.
Another important aspect of freezing okra is the removal of air. Air can cause freezer burn and affect the overall quality of the okra. To prevent this, make sure to remove as much air as possible from the containers before sealing them. This can be done by gently pressing the bags or containers to eliminate any excess air trapped inside. By doing so, you can help maintain the freshness and flavor of the okra.
Labeling and Shelf Life
Labeling each container or bag with the date of freezing is a simple yet effective way to keep track of its shelf life. By clearly marking the date, you can easily identify the oldest okra in your freezer and prioritize its use. This practice ensures that you consume the oldest okra first, minimizing any potential waste.
When it comes to the shelf life of frozen okra, it can be stored for up to 12 months in a standard freezer without a dramatic loss in quality. However, it’s important to note that the sooner you use the frozen okra, the better it will taste. Over time, frozen okra may lose some of its texture and flavor, so it’s best to consume it within the recommended time frame for optimal enjoyment.
Additionally, it’s worth mentioning that the quality of the okra can also depend on how it was prepared before freezing. For the best results, it’s recommended to blanch the okra before freezing. Blanching involves briefly immersing the okra in boiling water, followed by an immediate plunge into ice water to stop the cooking process. This step helps to preserve the okra’s color, texture, and nutritional value.
In conclusion, proper storage is crucial for maintaining the quality of frozen okra. By choosing the right containers, removing excess air, and labeling them correctly, you can ensure that your frozen okra stays fresh and delicious for an extended period. Remember to consume the okra within the recommended time frame for the best taste and texture. Happy freezing!
Using Frozen Okra
Once you are ready to use your frozen okra, it is important to follow the proper thawing process and cooking techniques to make the most of its flavors and textures.
Thawing Process for Frozen Okra
The safest way to thaw frozen okra is by transferring it from the freezer to the refrigerator. Allow it to thaw slowly overnight or for at least 8 hours. This gradual thawing minimizes any potential loss of moisture and helps maintain the okra’s texture.
Cooking with Frozen Okra
There are numerous ways to enjoy frozen okra in your favorite recipes. It is a versatile ingredient that can be added to stews, soups, stir-fries, or even roasted as a side dish. Keep in mind that frozen okra may release more liquid when cooked, so adjust your recipe accordingly.
In conclusion, freezing okra at home is a simple and effective method to preserve this nutritious vegetable. By following the proper preparation, freezing, and storage techniques, you can enjoy the benefits of okra all year round. From its health benefits to its cooking versatility, frozen okra is a valuable addition to your kitchen.
