
If you’re wondering whether you can freeze blanched vegetables and how to do it, you’ve come to the right place. Freezing blanched vegetables is a great way to preserve their nutrients and flavor for later use. In this article, we will explore the process of blanching, the importance of blanching vegetables before freezing, the steps involved in blanching, proper packaging for freezing, the ideal freezing temperature, thawing techniques for frozen vegetables, cooking with thawed vegetables, and answers to frequently asked questions about freezing blanched vegetables.
Understanding the Process of Blanching
Blanching is a cooking technique that involves briefly boiling vegetables in salted water or steam, followed by rapid cooling in ice water. The purpose of blanching is to partially cook the vegetables, which helps to preserve their color, texture, and nutrients during freezing.
What is Blanching?
Blanching is a crucial step in the freezing process as it inactivates the enzymes that can cause vegetables to spoil or lose their quality over time. Enzymes are natural substances found in vegetables that are responsible for ripening, softening, and breaking down the nutrients. By blanching, you halt these enzyme actions, allowing you to freeze vegetables at their peak freshness.
The Importance of Blanching Vegetables
Blanching serves several purposes when it comes to freezing vegetables. Firstly, it helps to maintain the vibrant color of vegetables, making them look more enticing and appetizing when thawed. Secondly, blanching helps to preserve the texture of vegetables, preventing them from becoming mushy or tough after freezing. Finally, blanching helps to retain the key nutrients present in vegetables, ensuring that they remain nutritious even after being stored in the freezer.
Blanching also plays a significant role in enhancing the overall taste of vegetables. When vegetables are blanched, their natural sugars are released, resulting in a sweeter and more flavorful taste. This is particularly beneficial for vegetables that are intended to be used in dishes such as stir-fries or salads, where their taste is a prominent factor.
Another advantage of blanching is that it helps to remove any dirt, bacteria, or pesticides that may be present on the surface of the vegetables. The brief boiling process kills off any harmful microorganisms, ensuring that the vegetables are safe to consume. Additionally, blanching can help to remove any bitter flavors that some vegetables may have, making them more enjoyable to eat.
Blanching is a relatively quick and easy process that can be done in just a few minutes. However, it is important to follow the recommended blanching times for different types of vegetables to achieve optimal results. Over-blanching can result in the loss of nutrients and a less desirable texture, while under-blanching may not effectively inactivate the enzymes, leading to decreased quality during freezing.
After blanching, it is essential to cool the vegetables rapidly in ice water. This step, known as “shocking,” halts the cooking process and helps to maintain the vegetables’ vibrant color and crispness. Once the vegetables are cooled, they can be drained and packaged for freezing. It is recommended to use airtight containers or freezer bags to prevent freezer burn and maintain the quality of the blanched vegetables.
When it comes to thawing and using blanched vegetables, it is best to thaw them in the refrigerator rather than at room temperature. This gradual thawing process helps to retain the vegetables’ texture and flavor. Blanching allows you to enjoy the taste and nutritional benefits of fresh vegetables even when they are out of season, making it a valuable technique for home cooks and food preservation enthusiasts alike.
Steps to Blanching Vegetables
Blanching vegetables is a crucial step in many cooking processes, as it helps to preserve their color, texture, and flavor. By briefly boiling the vegetables and then rapidly cooling them, you can maintain their vibrant appearance and crispness. Now that you understand the importance of blanching, let’s take a closer look at the steps involved.
Preparing Your Vegetables
Before you begin blanching, it’s essential to prepare your vegetables properly. Start by washing them thoroughly under cold running water to remove any dirt or debris that may be clinging to the surface. This step is particularly crucial if you’re using fresh vegetables straight from the garden or farmers market.
Once your vegetables are clean, it’s time to trim them. Check each vegetable for any woody stems or tough ends that need to be removed. These parts can be challenging to chew and may affect the overall texture of the dish. By trimming them off, you’ll ensure that your blanched vegetables are tender and enjoyable to eat.
If you’re working with larger vegetables, such as broccoli or cauliflower, you may want to consider cutting them into smaller, more manageable pieces. This step is optional but can be helpful if you prefer bite-sized portions or if you’re planning to use the blanched vegetables in a specific recipe.
The Blanching Process
Now that your vegetables are prepped and ready, it’s time to move on to the blanching process itself. Start by filling a large pot with water and adding a generous amount of salt. The salt helps to enhance the flavor of the vegetables and also helps to maintain their vibrant color.
Place the pot on the stove and bring the water to a rolling boil. The water should be vigorously bubbling before you add the vegetables. Carefully place the prepared vegetables into the boiling water, ensuring that they are fully submerged. It’s essential not to overcrowd the pot, as this can lead to uneven cooking and affect the final result.
The blanching time can vary depending on the type and size of the vegetables you’re working with. It’s crucial to refer to a blanching chart specific to the vegetables you’re blanching. This chart will provide you with the recommended blanching time, ensuring that your vegetables are cooked to perfection.
As the vegetables cook, keep a close eye on them to prevent overcooking. You want them to be tender but still retain their crispness. Once the recommended blanching time has elapsed, it’s time to remove the vegetables from the boiling water.
To halt the cooking process and preserve the vibrant color of the blanched vegetables, quickly transfer them to a bowl of ice water. The ice water bath will shock the vegetables, rapidly cooling them down and stopping the cooking process. This step is crucial, as it helps to maintain the vegetables’ texture and color.
After a few minutes in the ice water bath, your blanched vegetables are ready to be used in your desired recipe. Whether you’re making a refreshing salad, stir-fry, or preserving the vegetables for future use, blanching ensures that they are at their best. So, next time you’re cooking with vegetables, don’t forget the blanching step!
Freezing Blanched Vegetables
After blanching, it’s time to freeze your vegetables to extend their shelf life.
Freezing vegetables is a great way to preserve their freshness and nutritional value. Whether you have a surplus of homegrown produce or want to take advantage of a great sale at the grocery store, freezing blanched vegetables allows you to enjoy them throughout the year.
But how do you go about freezing blanched vegetables? Let’s dive into the details.
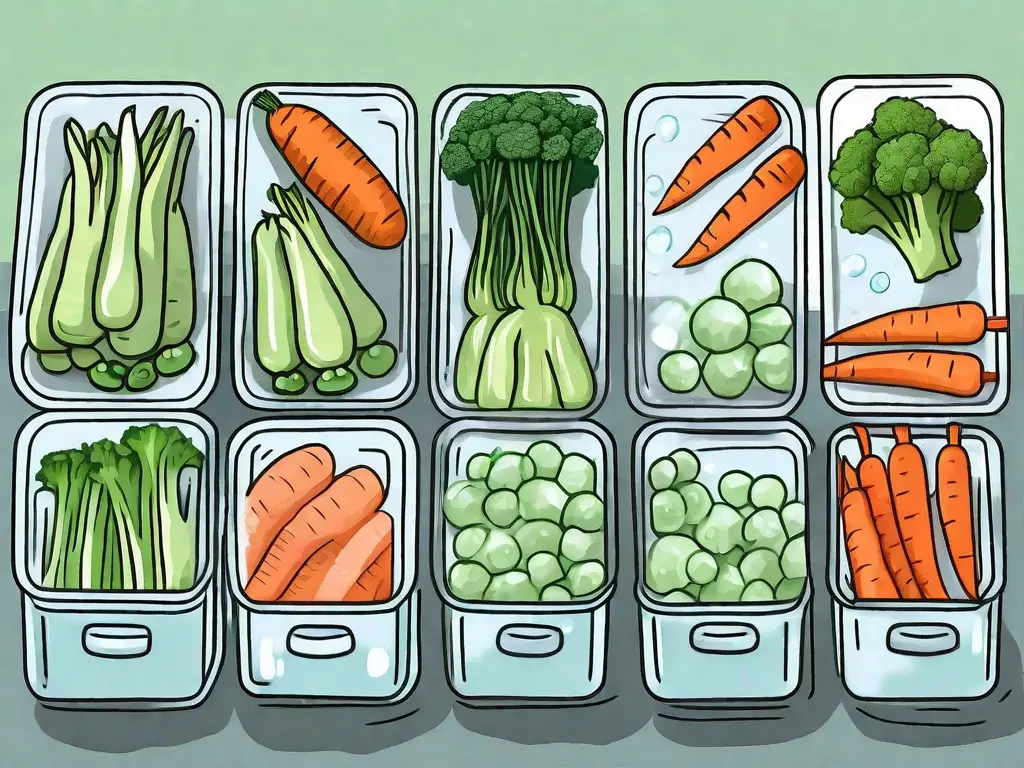
Proper Packaging for Freezing
Once you have blanched your vegetables to perfection, it’s crucial to package them correctly for freezing. This step ensures that your vegetables remain in optimal condition and are easy to use when you need them.
One popular method is to place the blanched vegetables into freezer-safe containers or bags. These containers are designed to withstand the extreme temperatures of the freezer without cracking or breaking. Alternatively, you can use heavy-duty freezer bags, which are durable and provide excellent protection against freezer burn.
When packing your blanched vegetables, make sure to remove as much air as possible from the containers or bags. Air can cause freezer burn, which can negatively impact the quality of your vegetables over time. To remove air, press down gently on the vegetables and seal the containers or bags tightly.
Don’t forget to label the containers with the name of the vegetable and the date of freezing. This simple step will save you from the guessing game later on when you’re searching for a specific vegetable in your freezer.
The Ideal Freezing Temperature
Now that your blanched vegetables are properly packaged, it’s time to store them in the freezer. But what is the ideal freezing temperature?
For optimal quality and safety, set your freezer to a temperature of 0°F (-18°C) or below. This low temperature ensures that your vegetables freeze quickly, preserving their texture, flavor, and nutrients. It also helps to prevent the growth of harmful bacteria, keeping your frozen vegetables safe to consume.
It’s worth noting that maintaining a consistent freezing temperature is crucial. Fluctuating temperatures can cause ice crystals to form, which can affect the overall quality of your vegetables. So, make sure to check your freezer’s temperature regularly and adjust it if necessary.
By following these steps, you can confidently freeze your blanched vegetables and enjoy their goodness for months to come. Whether you’re making a hearty stew in the middle of winter or adding a nutritious touch to your summer salads, your frozen vegetables will be ready to enhance any dish.
Thawing and Using Frozen Vegetables
When you are ready to use your frozen blanched vegetables, it’s important to thaw them properly.
Thawing Techniques for Frozen Vegetables
The best way to thaw your frozen vegetables is to transfer them to the refrigerator and allow them to thaw overnight. This slow thawing process helps to retain the vegetables’ flavor and texture. If you’re in a hurry, you can thaw the vegetables in the microwave using the defrost function, but be cautious not to overheat them.
Cooking with Thawed Vegetables
Once thawed, you can cook blanched vegetables just like fresh ones. Incorporate them into your favorite recipes, such as stir-fries, soups, stews, or side dishes. The possibilities are endless!
Frequently Asked Questions about Freezing Blanched Vegetables
How Long Can You Keep Blanched Vegetables in the Freezer?
When properly blanched, packaged, and stored at 0°F or below, most blanched vegetables can be kept in the freezer for up to 12 months. However, for optimal quality, it is recommended to consume them within 8 to 10 months.
Can All Vegetables Be Blanched and Frozen?
While blanching is suitable for most vegetables, there are a few exceptions. Vegetables with high water content such as lettuce, cucumbers, and radishes do not freeze well and are best consumed fresh. Additionally, some vegetables are best blanched before freezing, while others can be frozen directly without blanching, such as bell peppers, onions, and chili peppers. It’s always a good idea to consult a reliable blanching guide for specific vegetables.
By following the steps outlined in this article, you can confidently freeze blanched vegetables and enjoy their freshness and nutrients long after their harvest season. Whether you’re stocking up on seasonal produce, preserving your own garden’s bounty, or simply looking to reduce food waste, freezing blanched vegetables is a practical and delicious solution. So, start blanching and freezing your favorite vegetables today and enjoy the convenience of having them readily available in your freezer!
